

The sun rises over your campsite, daylight bright against your closed eyes. You open your eyes and look around. You’re the first person awake at your campsite. You step out of your RV, or tent, and look at the scene around you. The sun reflects on the water, the rays sometimes shining in your eyes. A cool breeze brushes your unbrushed hair out of your face.
You may be camping, but your craving for coffee is still the same. However, you’re at a campsite where there’s limited electricity. What do you do? What do you use? You remember you bought a camping percolator before you left for your camping trip, but do you know how to use it? By the end of this article, you’ll know exactly how to use that percolator to make the best coffee you can get on a camping trip.
What is a camping percolator?
A percolator is a coffee pot made for campers and outdoors people. It’s hard to go a weekend without a cup of coffee if you’re used to drinking multiple cups every day. With a camping percolator, you will have an easier camping trip with your much-needed caffeine to start your day. The camping trip will go much smoother, especially if it’s had a rough start.
There are many different types of camping percolators. Some need an outlet plug, some need batteries, and some need a fire to use. This article is going to cover how to use the camping percolators that require fire to use. These are the traditional coffee pots that cowboys would’ve used in the wild west.
The traditional camping percolator has the basic parts of a coffee pot.
- basket
- stem
- lid
- coffee pot and lid
for Brewing Coffee over Stove and Fire | Ideal for Campsite, Cabin, RV, Kitchen, Groups, Backpacking
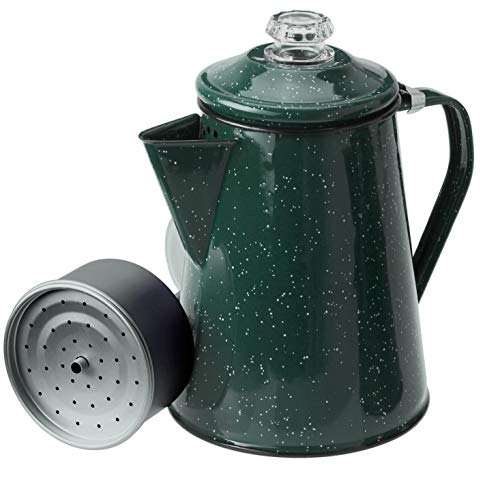
The basket sits on the step and has its lid. The coffee pot has a separate lid. When you boil the coffee, you want to put the coffee in the basket and stem before you add the water. People who camp in tents use the traditional camping percolator. It gives you the feel of calm while you’re roughing it out in the wilderness on your holiday.
Making the first pot of coffee in the morning is an easier process than you think. There are multiple steps involved, but once you finished, you’ll be proud of how hard you worked for that pot of coffee! If you want to score points with everyone you’re camping with, you can make the pot big enough for everyone to enjoy!
If it’s a cold night, and you have kids with you, don’t worry! If you follow the same steps but replace coffee with hot cocoa, the kids will be as happy as the adults to have a nice, hot drink at night.
How to use a percolator when camping?
Step one: Make a campfire
The fire doesn’t have to be a big one. It needs to be big enough that you can collect coals, but small enough that you can collect those coals effectively. Once you have your materials to make the fire, light it up and let it burn down to the point where the wood is starting to break into coals.
Step two: Create a coal bed
Make sure you’re taking proper safety precautions with this one. You’ll be moving coals, so you don’t want to use your hands for this. Make sure you have a shovel handy. Dig a hole next to the fire. The hole needs to be six inches deep and twelve inches wide. Move the wood coals from the fire into the coal bed.
Step three: Prepare the percolator
If you need one cup of coffee, you only need about six ounces of water. For this step, you’ll need to think about everyone camping with you. If your spouse is a coffee drinker, you’ll want to have a cup ready for them, too, when they get out of bed. If you’re camping with more than one adult, they’ll appreciate you making a pot of coffee for everyone.
Add the water to the percolator then add the coffee. Normally, two tablespoons of coffee grounds would work best, but if you like your coffee strong, you can add as many scoops of coffee grounds as you like. Put the coffee in the basket and cover it with the lid.
Step four: Boil the coffee
When you fill the coffee basket and seal the lid, put the stem and basket in the coffee pot before you add water. Then, when you close the coffee pot lid, put the coffee pot on the coal bed to boil the water. While you’re waiting for it to boil, get out the coffee and creamer and wait for it to finish. Don’t let your coffee boil over. That’s precious coffee grounds wasted.
Step five: Enjoy
When the coffee starts boiling, then it’s finished! Take the coffee off the coal bed and pour the coffee in your cup. Now, you have a nice, hot cup of coffee to enjoy while you wait for the rest of your camping party to wake up. At this point, you can enjoy the peaceful scene around you for as long as you can. Once the kids wake up, there won’t be a quiet moment again until they fall asleep.
The cleanup
One of the great things about a traditional camping percolator is that it’s easier to clean up than the electric models. After you and your camping party finish drinking coffee, and the pot is cool enough to touch, take out the basket, stem, and lid. Thoroughly clean all of the parts of the percolator and put it back together. Then, place it where you packed it. It’ll last longer if you take good care of your percolator, it’ll last a long time. If you want to get rid of the coffee stains on the inside of the pot, a simple vinegar, and water solution to get rid of them.
Conclusion
Camping without your cup of coffee doesn’t have to be a miserable existence. You don’t have to go without your magical wake-up juice at all! As long as you camp your percolator and know how to use it, you’ll always have coffee no matter where you go camping.
Happy Camping!

Recommended Reading
How to fly with camping gear
It's an age-old question for campers who need to fly to their new camp location. Here's why I think driving is better, but how to make flying work if need be
How long does it take to hike a mile
If you go camping, then you'll probably end up hiking. We did some analysis and figured out how long it will take to hike a mile based on your body type
How to cook over a campfire
If you are camping, then you probably need to know how to cook over a campfire! Here is our guide on how to do it!
How to boil water to purify when camping
When you go camping, you need to bring a substantial amount of water with you or find water. But if you find water, you'll ask how to boil water to purify
The 2023 Ultimate Camping Checklist
Camping is popular since it is easy and gets you out in nature! The essential gear for camping is different from backpacking so read the ultimate camping checklist.
How to build a fire without matches
If you have matches, then it's easy to light a fire. If you don't, then you need to get creative to light a camp fire