

Camping is the ultimate recreation sport that brings families and friends together, but it can never be as fun when it gets dark around your campsite. Not only is this dangerous, as you can’t see and could run into something, but the odds are your little ones can get scared in the dark.
It’s little wonder then than camping generators have become incredibly popular. Their first use case was initially what we just mentioned above: lighting the campsite or your RV as it became dark outside. Whether tent camping or caravan/RV camping, you’ll need a generator to get a power supply for lighting.
However, generators have expanded to include a different set of uses. In case you carry some appliances like coffee maker, toaster, or even a microwave, you’ll enjoy having your wholesome meal altogether, through the courtesy of your generator.
But regardless of how you use your generator, you’ll have to ground your generator before it can serve you accordingly. So, how do you ground that generator?
First, let’s understand what grounding means and what the requirements are before we get to the actual procedure.
Note, however, that not all generators need to be grounded. Some are specially designed with features that make the generator safe to operate without having to be grounded.
What does it mean to ground a generator?
Without getting too technical, grounding simply means connecting the generator to the ground so that it becomes safe for use. You could just as well say that you want to “earth” the generator.
If you’re going to get a bit technical, grounding means making an intentional connection between the generator and the reference ground where the reference ground is the generator’s frame and copper wire.
Why do I need to ground my generator?
For some generators, you don’t need to ground them at all. Some of the newest models contain anti-grounding materials that take care of it for you.
However, grounding a generator must happen, whether it’s you grounding it or the generator is self-grounding. According to OHSA, you run the risk of electric shock or electrocution if you don’t take the necessary steps to ground it.
What do I need to ground it?
There are particular tools that you require to succeed in grounding. The absence of one or more of these tools makes the process difficult and even dangerous. Below are the tools that will enable you to ground your generator effectively:
Copper wire
A copper wire serves to connect your generator to the copper rod for it to be grounded. Don’t just go for any wire; look for high-quality copper wire. Protection from electrocution is not an area to skimp on cost!
Copper rod
A copper rod is the most crucial grounding equipment that you’ll need. The rod should be longer than 4 feet.
Strippers
The copper wire must be attached to a copper rod from one end and to the generator from the other end. That is only possible if the copper wire is stripped. Strippers will be necessary when removing the outer covering of the copper wire. If you haven’t stripped wire before, here’s a piece on how to do so.
Stranded Wire Cutter, Solid Wire Cutter, Cuts Copper Wire
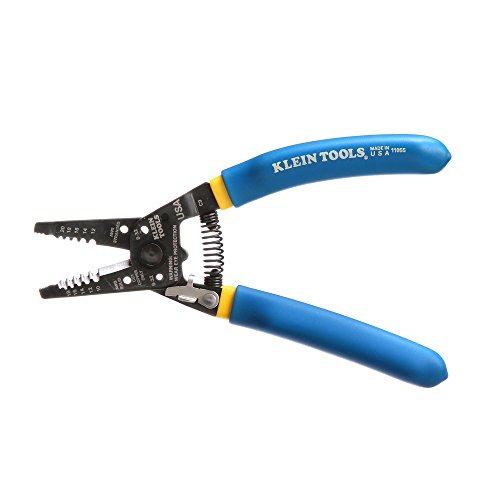
A sharp blade can as well serve the same purpose, but is much more difficult to strip the wire. If it’s your first time, we recommend using strippers. Avoid using your teeth or nails, no matter how tempting. Trying to bite metal, even if it’s just a wire, is a health risk.
Mallet
How will you sink your copper rod into the surface if you don’t have a mallet to hit on it? Well, now you already know why you need a hammer. If the ground surface is too dry/hard, you might consider having some water to wet the grounding area for the easy hammering of the rod.
You can also use a hammer here, although that may dent the copper rod.
Pliers
A firm connection between the copper rod and wire is vital. For this reason, you’ll need a pair of pliers to wind the wire tightly around the rod.
Wrench
While the pliers help you connect the copper wire to the rod, a wrench helps in connecting the other end of the copper wire to the generator. It does so by loosening a particular bolt on the generator so that the connection will be efficient.
This is a “nice to have” but we haven’t found it to be a “need to have.” You can typically connect the wire to the rod by tightly wrapping the wire with your hands.
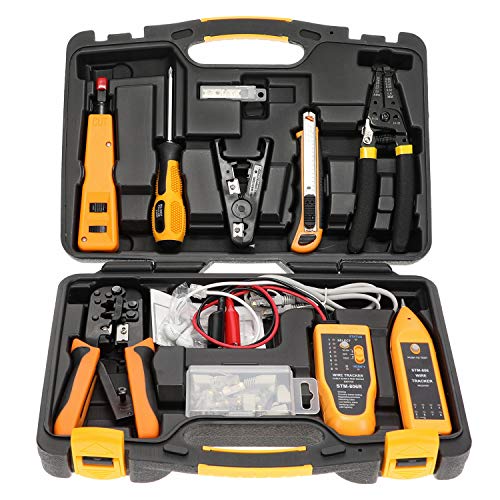
– Electronic Tool Set | Crimping Tool, LAN/Ethernet/Cat5/Cat6 Cable Tester, Gauge Wire Stripper Cutting Twisting Tool, Punch Down, Screwdriver, Knife
Procedure to ground your generator
As long as you have all the essential tools handy, grounding a generator shouldn’t be a daunting task. The following steps will guide you through how to ground a generator when camping::
Step 1: Hammer the copper rod in the ground
Find a suitable location in which to ground your rod. If the area is too dry, pour some water to soften the soil around the area. You can also dig a small starter hole and then using a hammer, drive the rod into the ground surface. If your camping area is rocky, take out some rocks and burry your rod at a 30 degrees angle. Be sure to leave a considerable length of the rod above the ground from where you’ll attach the copper wire.
Step 2: Strip the copper wire
Reach your strippers and strip both outer sides of the copper wire. Only trip the ends; that is, do not strip the whole wire off the insulation. Strip enough length on each side for attaching to the rod and the generator. Be careful not to cut any piece of the wire.
Step 3: Connect the copper wire to the rod.
Secure one side of the copper wire to the copper rod. Use a pair of pliers to reinforce so that you end up with a perfect grip. The important thing is to make the connection tight. It through tight contact that electrical energy will be passed efficiently without any mishaps.
Step 4: Attach to the generator.
If you look keenly, your generator has a grounding bolt. Loosen the bolt using the wrench. Make the bolt not too loose; it should be just enough to wrap the other end of the copper wire. Wrap the stripped end of the wire around the bolt and then tighten it using the wrench to form a secure connection.
If you follow these steps, you can proudly say that you have grounded your generator safely for use.
Important takeaway points
Now that you are equipped with information on how to ground your generator, there are a few crucial points that you need to take into account. They include:
- Carry a flashlight so it will be easy to ground the generator when its dark.
- Before you even carry your generator for camping, be sure to run a test on it so it will be easy to operate
- Bring adequate gasoline/fuel for your generator so that it doesn’t run out when you need it most
- Carry a long extension code that will keep your generator well away from where you are to avoid poisoning by carbon monoxide.
- When not in use, cover the generator to keep off dirt and rain.
Final words
If you are a camping enthusiast, a portable generator is a worthwhile investment. Power needs during camping are quite plenty, and you cannot afford to cut off the thrill of your camping adventure due to a lack of power. There are plenty of generators in the market, ranging from cheap to expensive; the key idea is, however, to buy a high-quality generator. Check also that the accompanying ground tools are of high quality. With all factors at hand, grounding your generator should take you little time and energy.
We’ll see you at the camp site!

Recommended Reading
How to make a comfortable camping bed
If you're going camping, then you'll probably find out it's less comfortable than home! Here are tips though to make your camping bed more comfortable
How to use a Magnesium Fire Starter
starting a fire is an important camping requirement. Here's how to use a magnesium fire starter to build you new camp fire
How to zip sleeping bags together
If you ever need to zip sleeping bags together for a medical emergency, here are our thoughts on how to
How to build a fire without matches
If you have matches, then it's easy to light a fire. If you don't, then you need to get creative to light a camp fire
How to use camping kettle
Using a kettle while camping is always a great idea, both for tea and for sanitizing water. Here's how to use one
How to fly with camping gear
It's an age-old question for campers who need to fly to their new camp location. Here's why I think driving is better, but how to make flying work if need be